Tarjeta con bolsillo doble
The Original version of this card is part of a challenge in the Scrapadabadoo group, It was designed by
Margaret Ann Moffa, and the flower was made with the tutorial from Jani Hollister Lewis.
This is my version.
La versión original de esta tarjeta es parte de un desafío en el grupo Scrapadabadoo, fue diseñada por Margaret Ann Moffa, y la flor la hice con el tutorial de Jani Hollister Lewis.
Esta es mi versión.

But you can make it in different sizes according with your needs:
Pero se puede hacer en diferentes tamaños de acuerdo con tus necesidades:

The measurements are:
Paper 11 x 8.5"
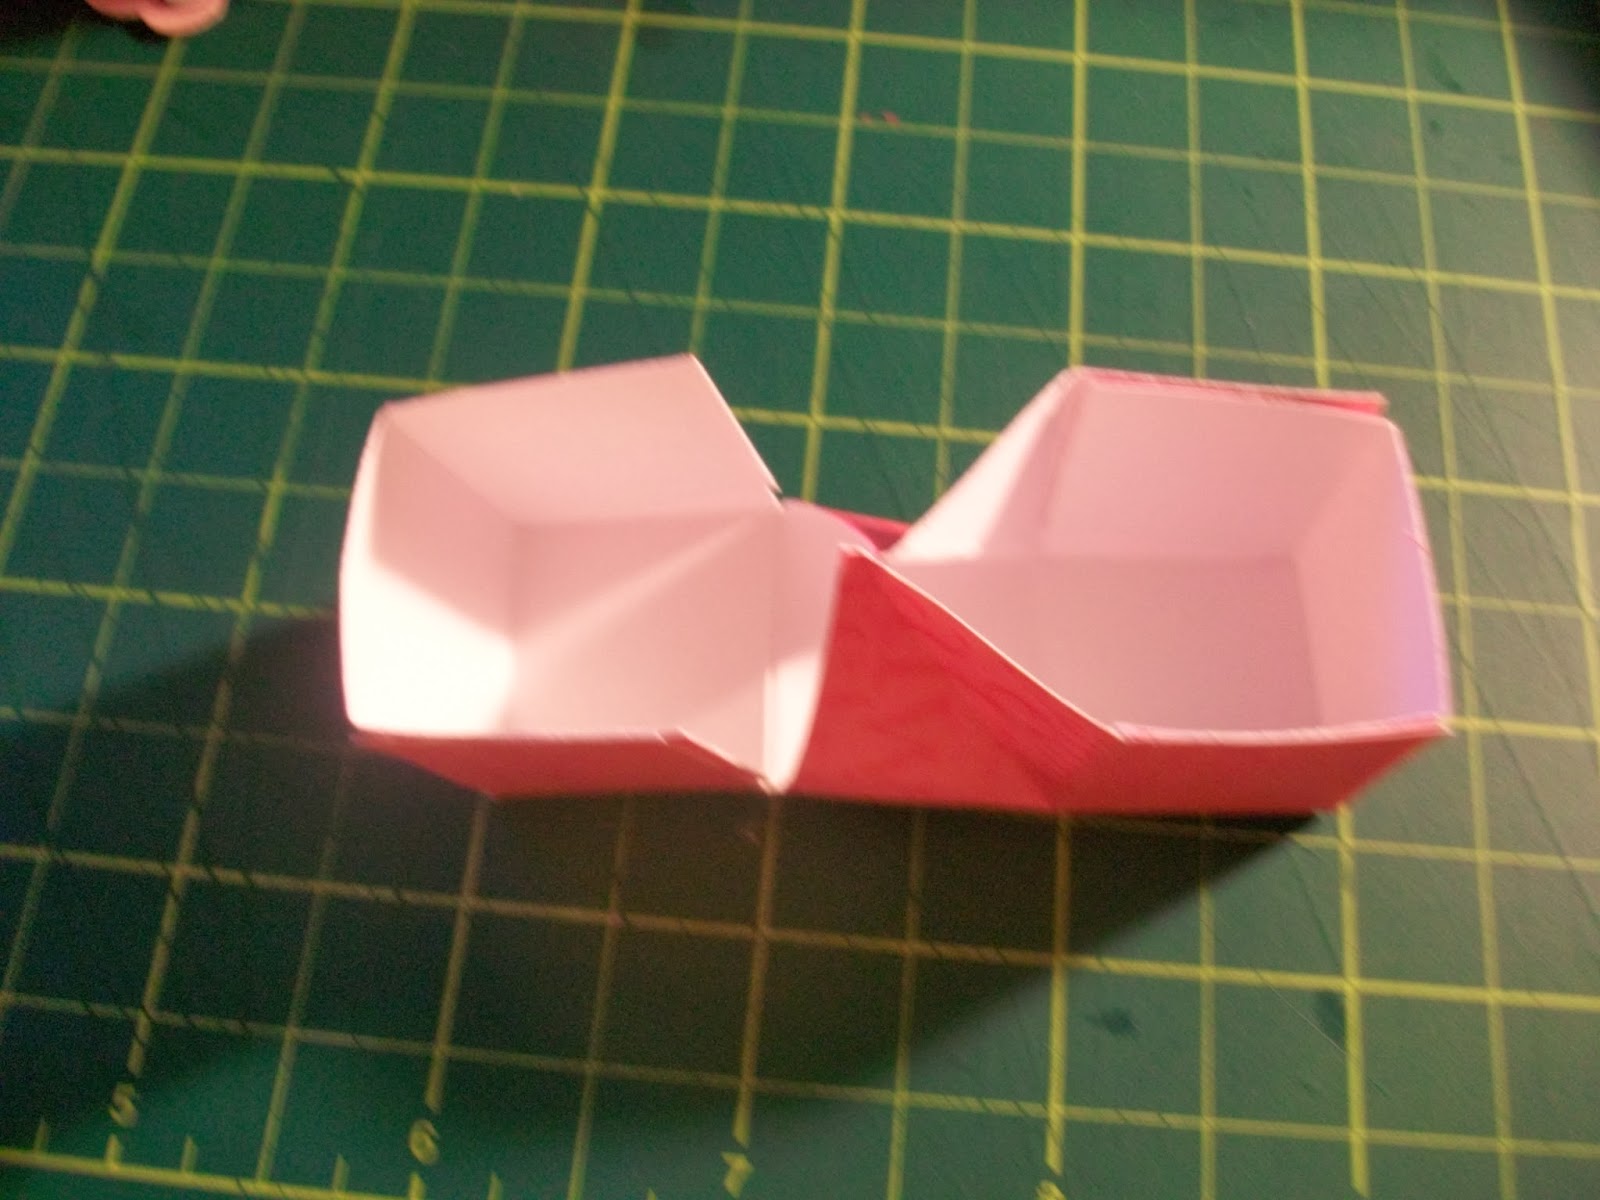
Score and fold it at 5.50" in the long side and at 4.15" in the small. If you don't like to measure, just fold it in half in both sides. To make the pocket mark in one corner measure 3" in each side and 4" in the opposite corner as shown in the picture. Cut as shown.
Las medidas son:
Papel 11 x 8.5 "
Marca y doblala a 5.50 "en el lado largo y en 4.15" en el pequeño. Si no te gusta medir, sólo dobla por la mitad en ambos lados. Para hacer la marca de bolsillo mide en una esquina 3 "en cada lado y 4" en la esquina opuesta, como se muestra en la imagen. Corta como se muestra.

Paper 5.30" x 4.15 (half of the big card)
Score and fold at 4.25" in the long side and 2 11/16" in the small, To make the pockets measure 3" in both sides of one corner and 2.30" in the opposite one, fold and cut as shown. You can use this one for a gift card, as it is a little big I made a tag to put the card there.
Papel 5.30 " x 4.15" (la mitad de la tarjeta grande)
Marca y se doblala en 4.25 "en el lado largo y 2 11/16" en el pequeño, para hacer los bolsillos marca 3" en una esquina por ambos lados y 2,30" en la opuesta, se dobla y se corta como se muestra. Puedes utilizarla para un tarjeta de regalo, como es un poco grande hice una etiqueta para poner la tarjeta allí.

Paper 6.75" x 4.75" (I used a page of a photo mat pad)
Score and fold at 3 3/8" in the long side and 2 3/8" in the short one, to make the pocket measure 2 3/8" in one corner and 1.75" in the opposite one, fold and cut as shown. You can also use a decorative punch to decorate your card.
Papel 6.75 "x 4.75" (yo usé una hoja de un blog para enmarcar fotos )
Marca y doblala en 3 3/8 "en el lado largo y 2 3/8" en el corto, para hacer la medida del bolsillo de 2 3/8" en ambos lados de una esquina y 1.75" en la esquina opuesta, Dobla y corta como se muestra . También puedes utilizar una perforadora decorativa para adornar su tarjeta.


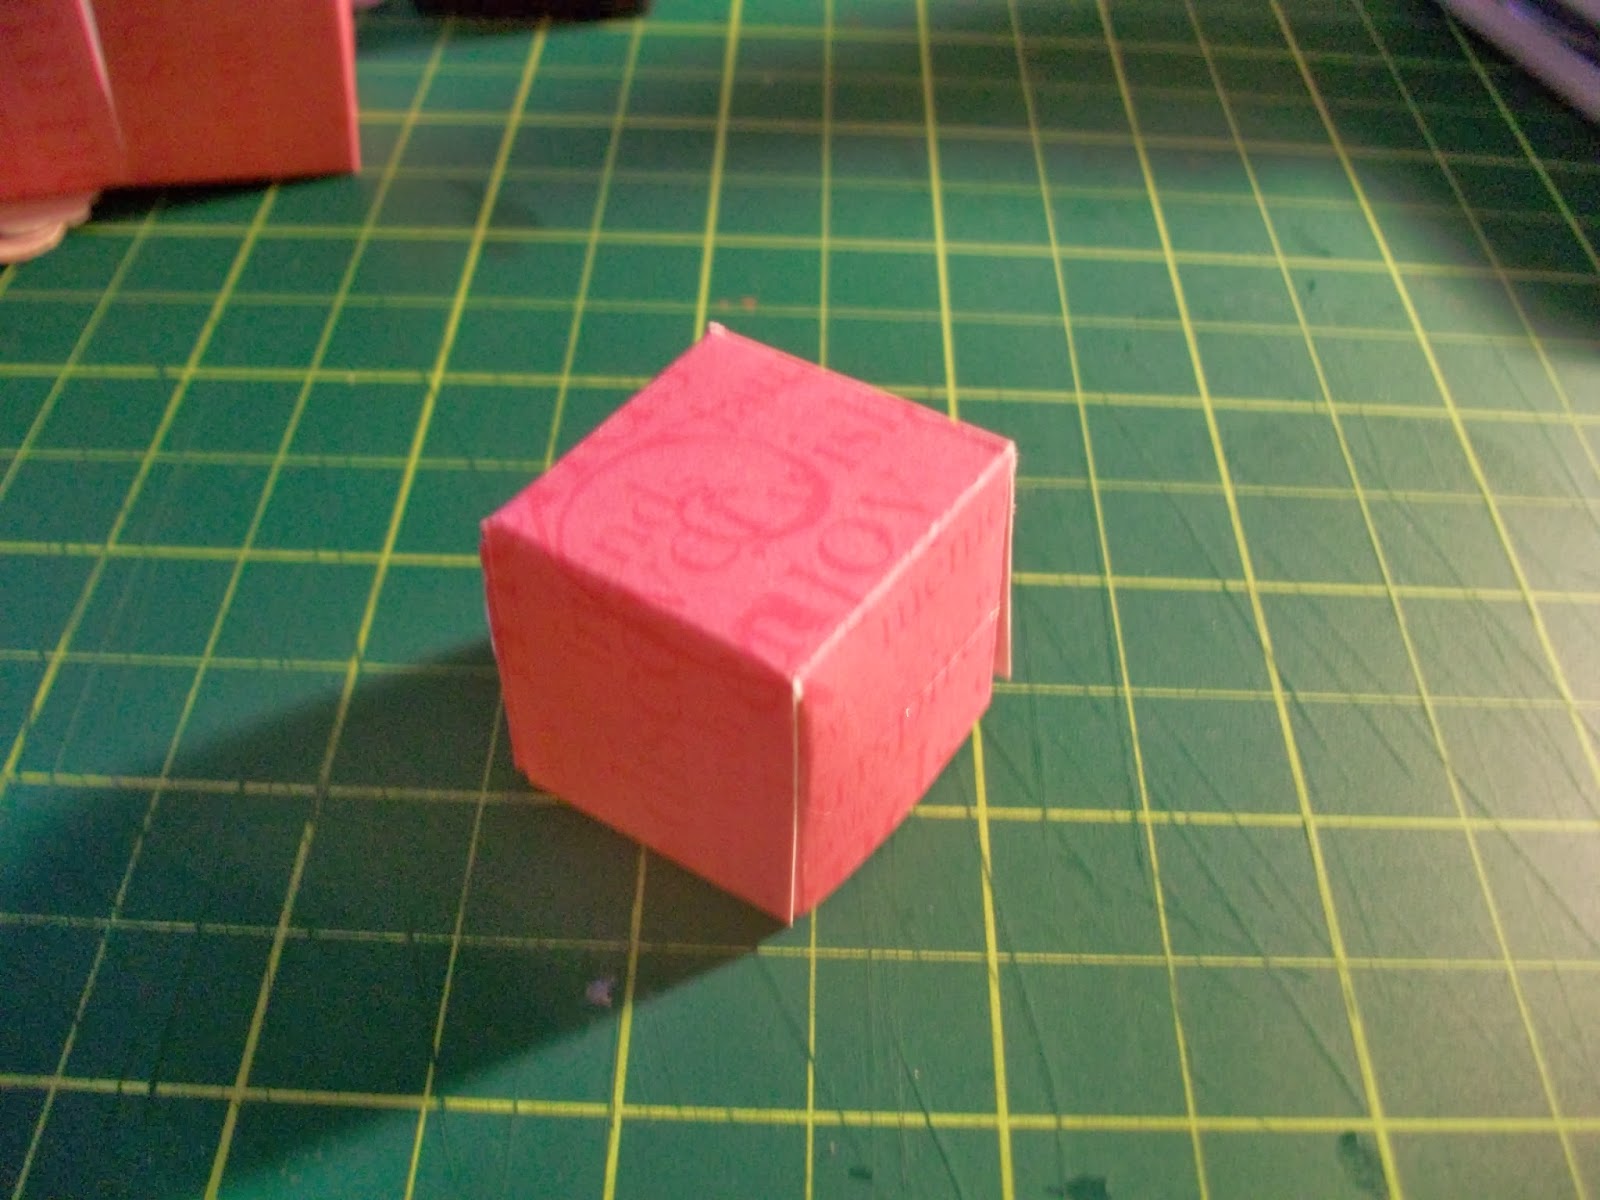
Fold as shown in the pictures above.
Dobla como se muestra abajo:


Put some embellisments and your card is done.
Adorna y tu tarjeta esta lista.
The Original version of this card is part of a challenge in the Scrapadabadoo group, It was designed by
Margaret Ann Moffa, and the flower was made with the tutorial from Jani Hollister Lewis.
This is my version.
La versión original de esta tarjeta es parte de un desafío en el grupo Scrapadabadoo, fue diseñada por Margaret Ann Moffa, y la flor la hice con el tutorial de Jani Hollister Lewis.
Esta es mi versión.
But you can make it in different sizes according with your needs:
Pero se puede hacer en diferentes tamaños de acuerdo con tus necesidades:
The measurements are:
Paper 11 x 8.5"
Score and fold it at 5.50" in the long side and at 4.15" in the small. If you don't like to measure, just fold it in half in both sides. To make the pocket mark in one corner measure 3" in each side and 4" in the opposite corner as shown in the picture. Cut as shown.
Las medidas son:
Papel 11 x 8.5 "
Marca y doblala a 5.50 "en el lado largo y en 4.15" en el pequeño. Si no te gusta medir, sólo dobla por la mitad en ambos lados. Para hacer la marca de bolsillo mide en una esquina 3 "en cada lado y 4" en la esquina opuesta, como se muestra en la imagen. Corta como se muestra.
Paper 5.30" x 4.15 (half of the big card)
Score and fold at 4.25" in the long side and 2 11/16" in the small, To make the pockets measure 3" in both sides of one corner and 2.30" in the opposite one, fold and cut as shown. You can use this one for a gift card, as it is a little big I made a tag to put the card there.
Papel 5.30 " x 4.15" (la mitad de la tarjeta grande)
Marca y se doblala en 4.25 "en el lado largo y 2 11/16" en el pequeño, para hacer los bolsillos marca 3" en una esquina por ambos lados y 2,30" en la opuesta, se dobla y se corta como se muestra. Puedes utilizarla para un tarjeta de regalo, como es un poco grande hice una etiqueta para poner la tarjeta allí.
Paper 6.75" x 4.75" (I used a page of a photo mat pad)
Score and fold at 3 3/8" in the long side and 2 3/8" in the short one, to make the pocket measure 2 3/8" in one corner and 1.75" in the opposite one, fold and cut as shown. You can also use a decorative punch to decorate your card.
Papel 6.75 "x 4.75" (yo usé una hoja de un blog para enmarcar fotos )
Marca y doblala en 3 3/8 "en el lado largo y 2 3/8" en el corto, para hacer la medida del bolsillo de 2 3/8" en ambos lados de una esquina y 1.75" en la esquina opuesta, Dobla y corta como se muestra . También puedes utilizar una perforadora decorativa para adornar su tarjeta.
Fold as shown in the pictures above.
Dobla como se muestra abajo:
Put some embellisments and your card is done.
Adorna y tu tarjeta esta lista.